Build and publish your menu
Add categories, items and options, then publish so everything updates.
Updated November 17, 2026
Add your menu
- Open Menu in the dashboard.
- Click Add category, such as Burgers or Drinks.
- Inside it, click Add item. On the next screen, in the Basics tab, enter a name, a price and, if you like, a Photo and a description.
- For choices such as size or extras, create a group in the Modifier groups tab. Then open the item's Options tab and click Attach a group. Each group has a selection rule, for example "Required, pick 1".
- In the item's Kitchen tab, choose the station that prepares the item, for example Kitchen or Bar. This decides where its ticket prints. The same tab has the Tax category.
- In Dietary & allergens, add the allergens so guests and the kitchen can see them.
- Click Save changes.
You can also bring a menu in. See Import your menu and customers.
Publish
Changes stay on the page until you click Save changes. Then click Publish to send the saved menu to your online ordering, kiosks, POS and delivery apps.
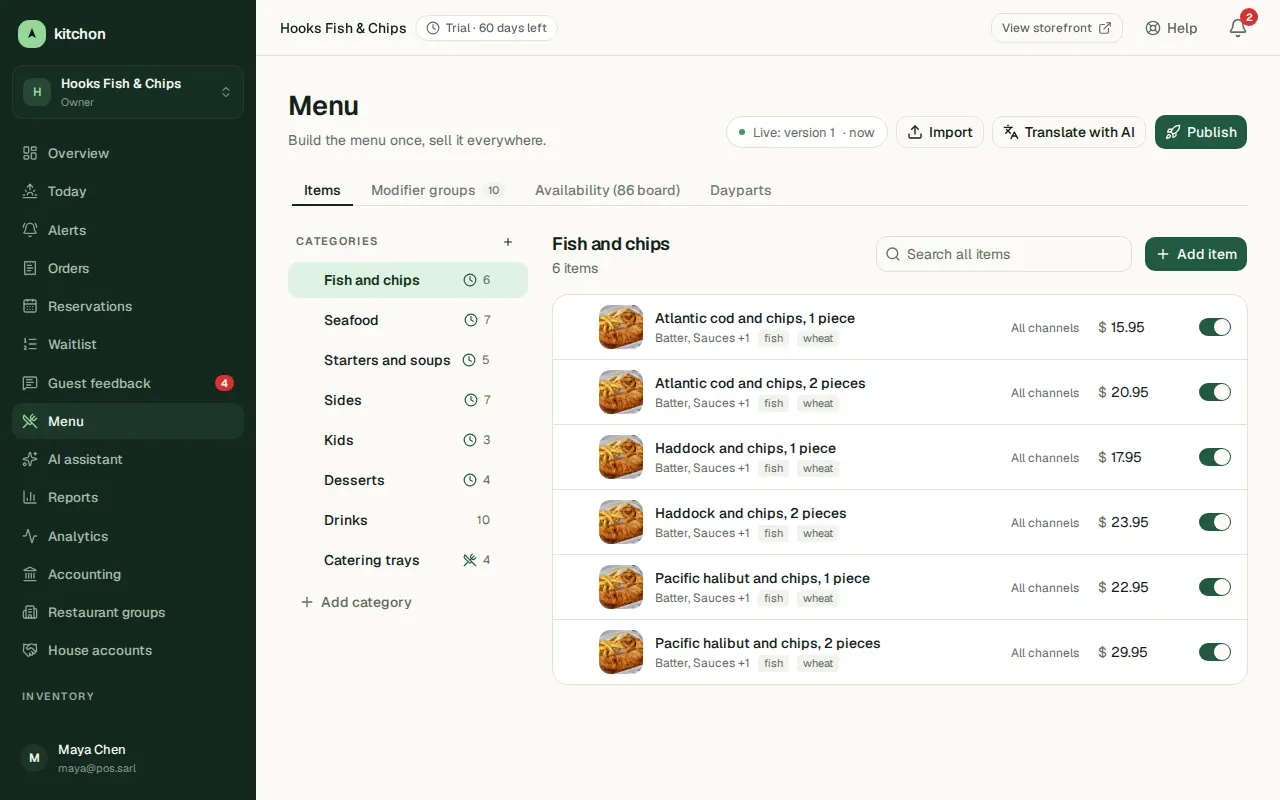
What you will see
After publishing, the top of the page shows "Live: version" and the version number. Tablets refresh in a moment. Guests see the new menu the next time they open your page.
Common problems
- I changed a price but guests still see the old one. You have not saved and published yet.
- An item is sold out. Open the Availability (86 board) tab and mark it Out of stock. Mark it In stock again when you have more. To hide an item from every channel without deleting it, turn off Show on the menu in its Basics tab.
Was this helpful?
Related articles
- Import your menu and customersBring a menu from GloriaFood or a spreadsheet, and your customer list.
- Turn on online orderingLet guests order from your page and pay by card.
- AI assistantWrite menu descriptions, translate your menu, build a menu from a photo or PDF, draft replies to guests and read a weekly summary.